Some cassette collections we receive for digitisation are in good shape and digitisation is a relatively smooth process. Often though, this is not the case. Some collections we are currently receiving were recorded over 50 years ago, have often been sitting for years in less than ideal conditions for maintaining their quality, e.g. high humidity, and over time have degraded in various ways. So, we often need to do some work to get the cassettes into shape before we can attempt to recover audio from them.
A collection we received recently from the Solomon Islands had a combination of issues: almost every tape had snapped at both ends, and many of the pressure pads (an internal cassette part which keeps the magnetic tape in the correct position to be read by the tape machine) had detached and been lost. Compounding these issues, the tapes were contained in a type of cassette housing that is not made to be reopened, so in order to access the tape each housing needed to be broken open and then the tape had to be transferred into a new housing. These issues needed to be dealt with before attempting digitisation. Here, I document the process I used to get this done.
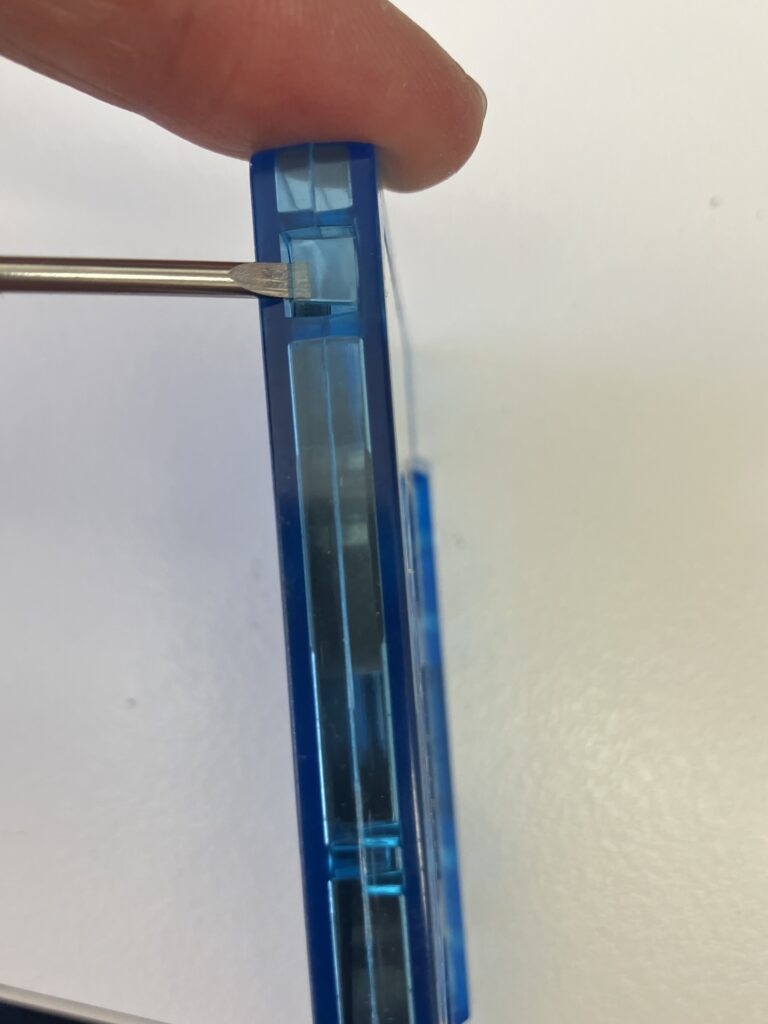
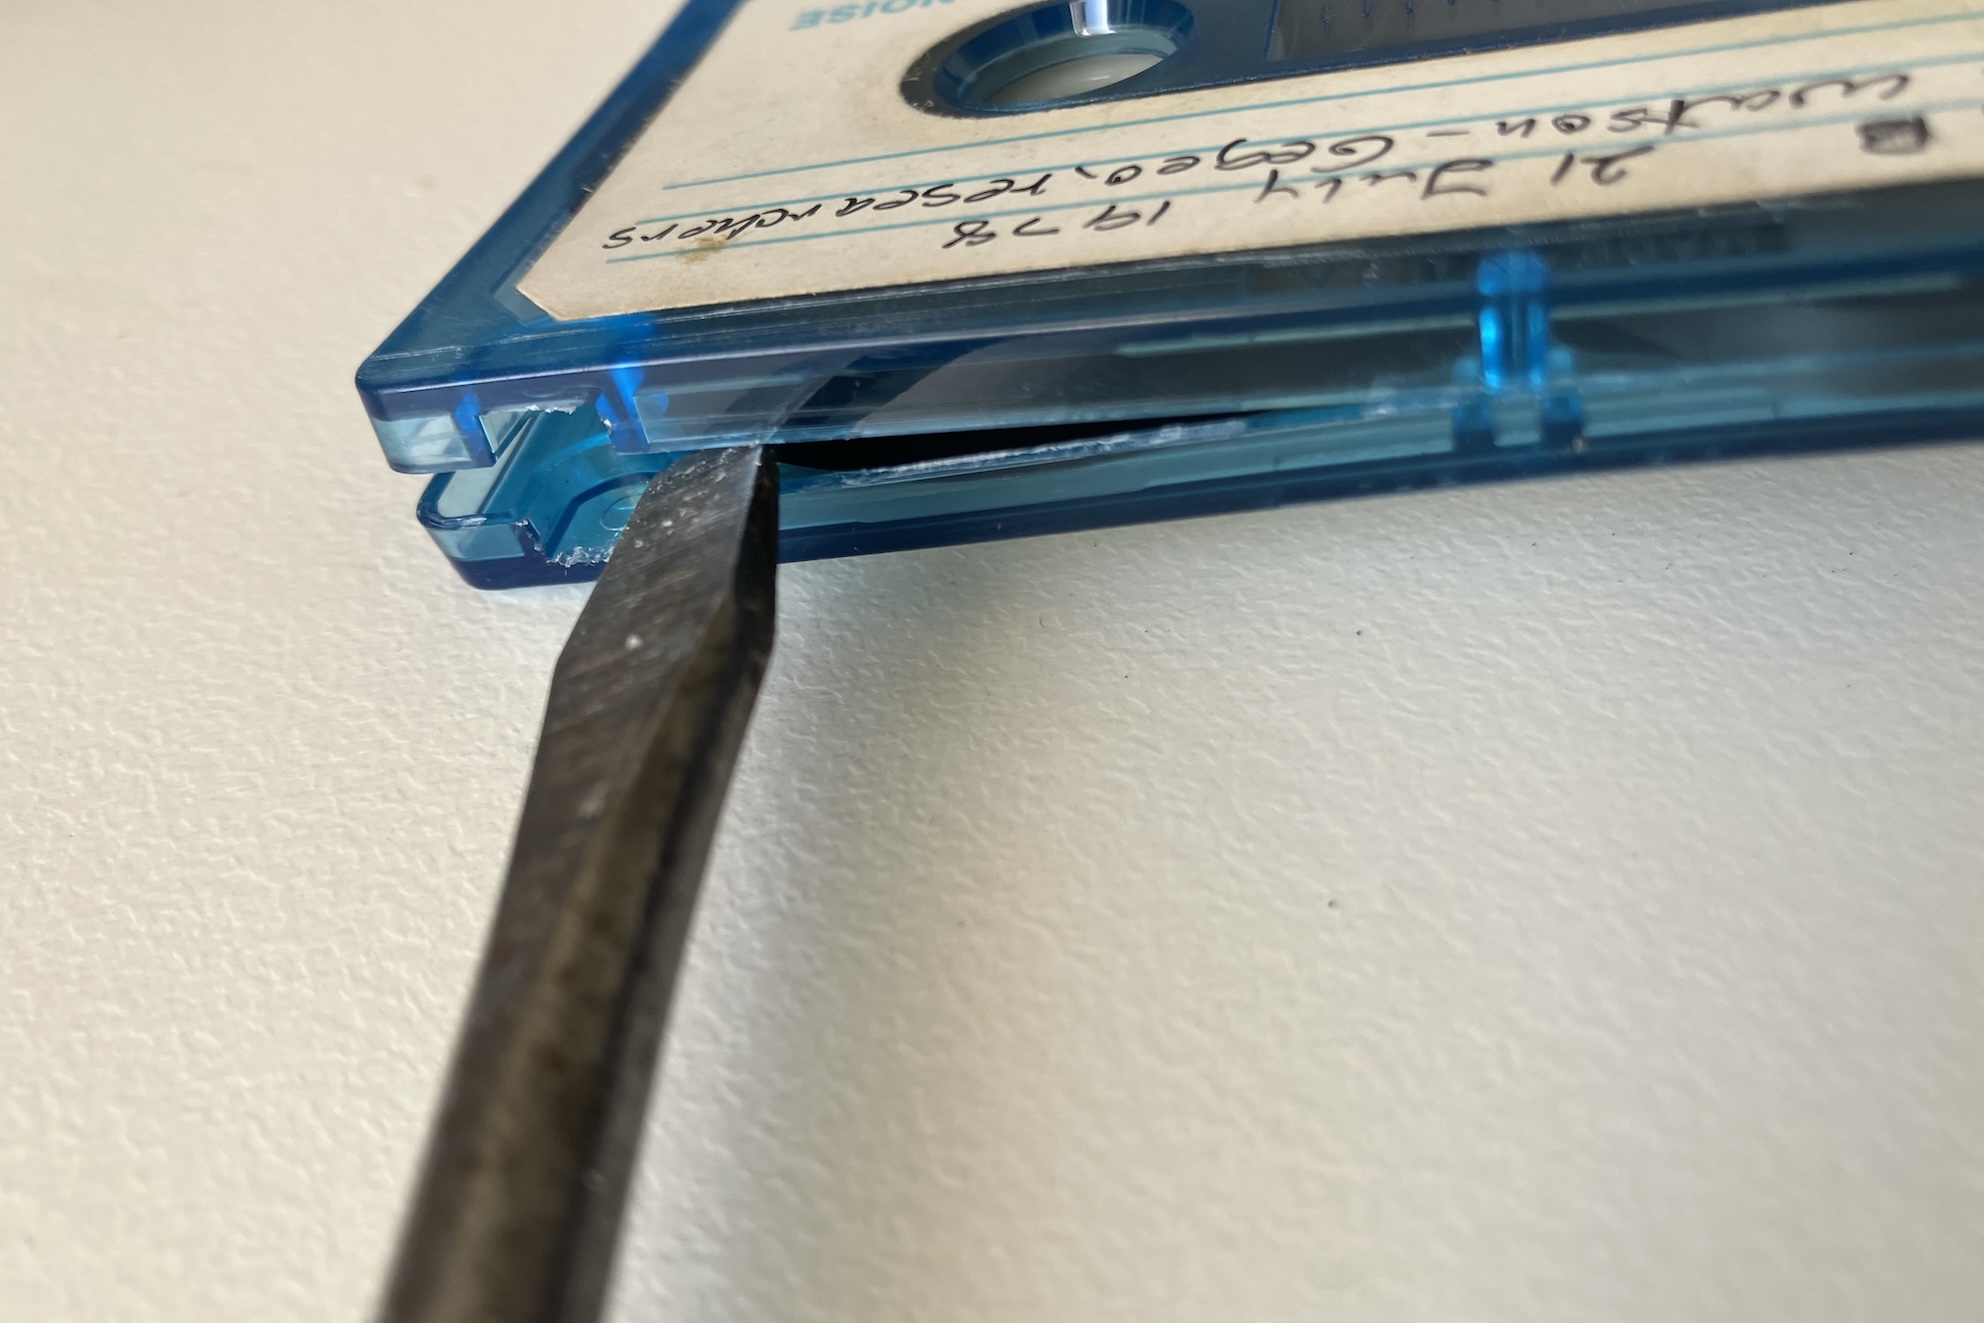
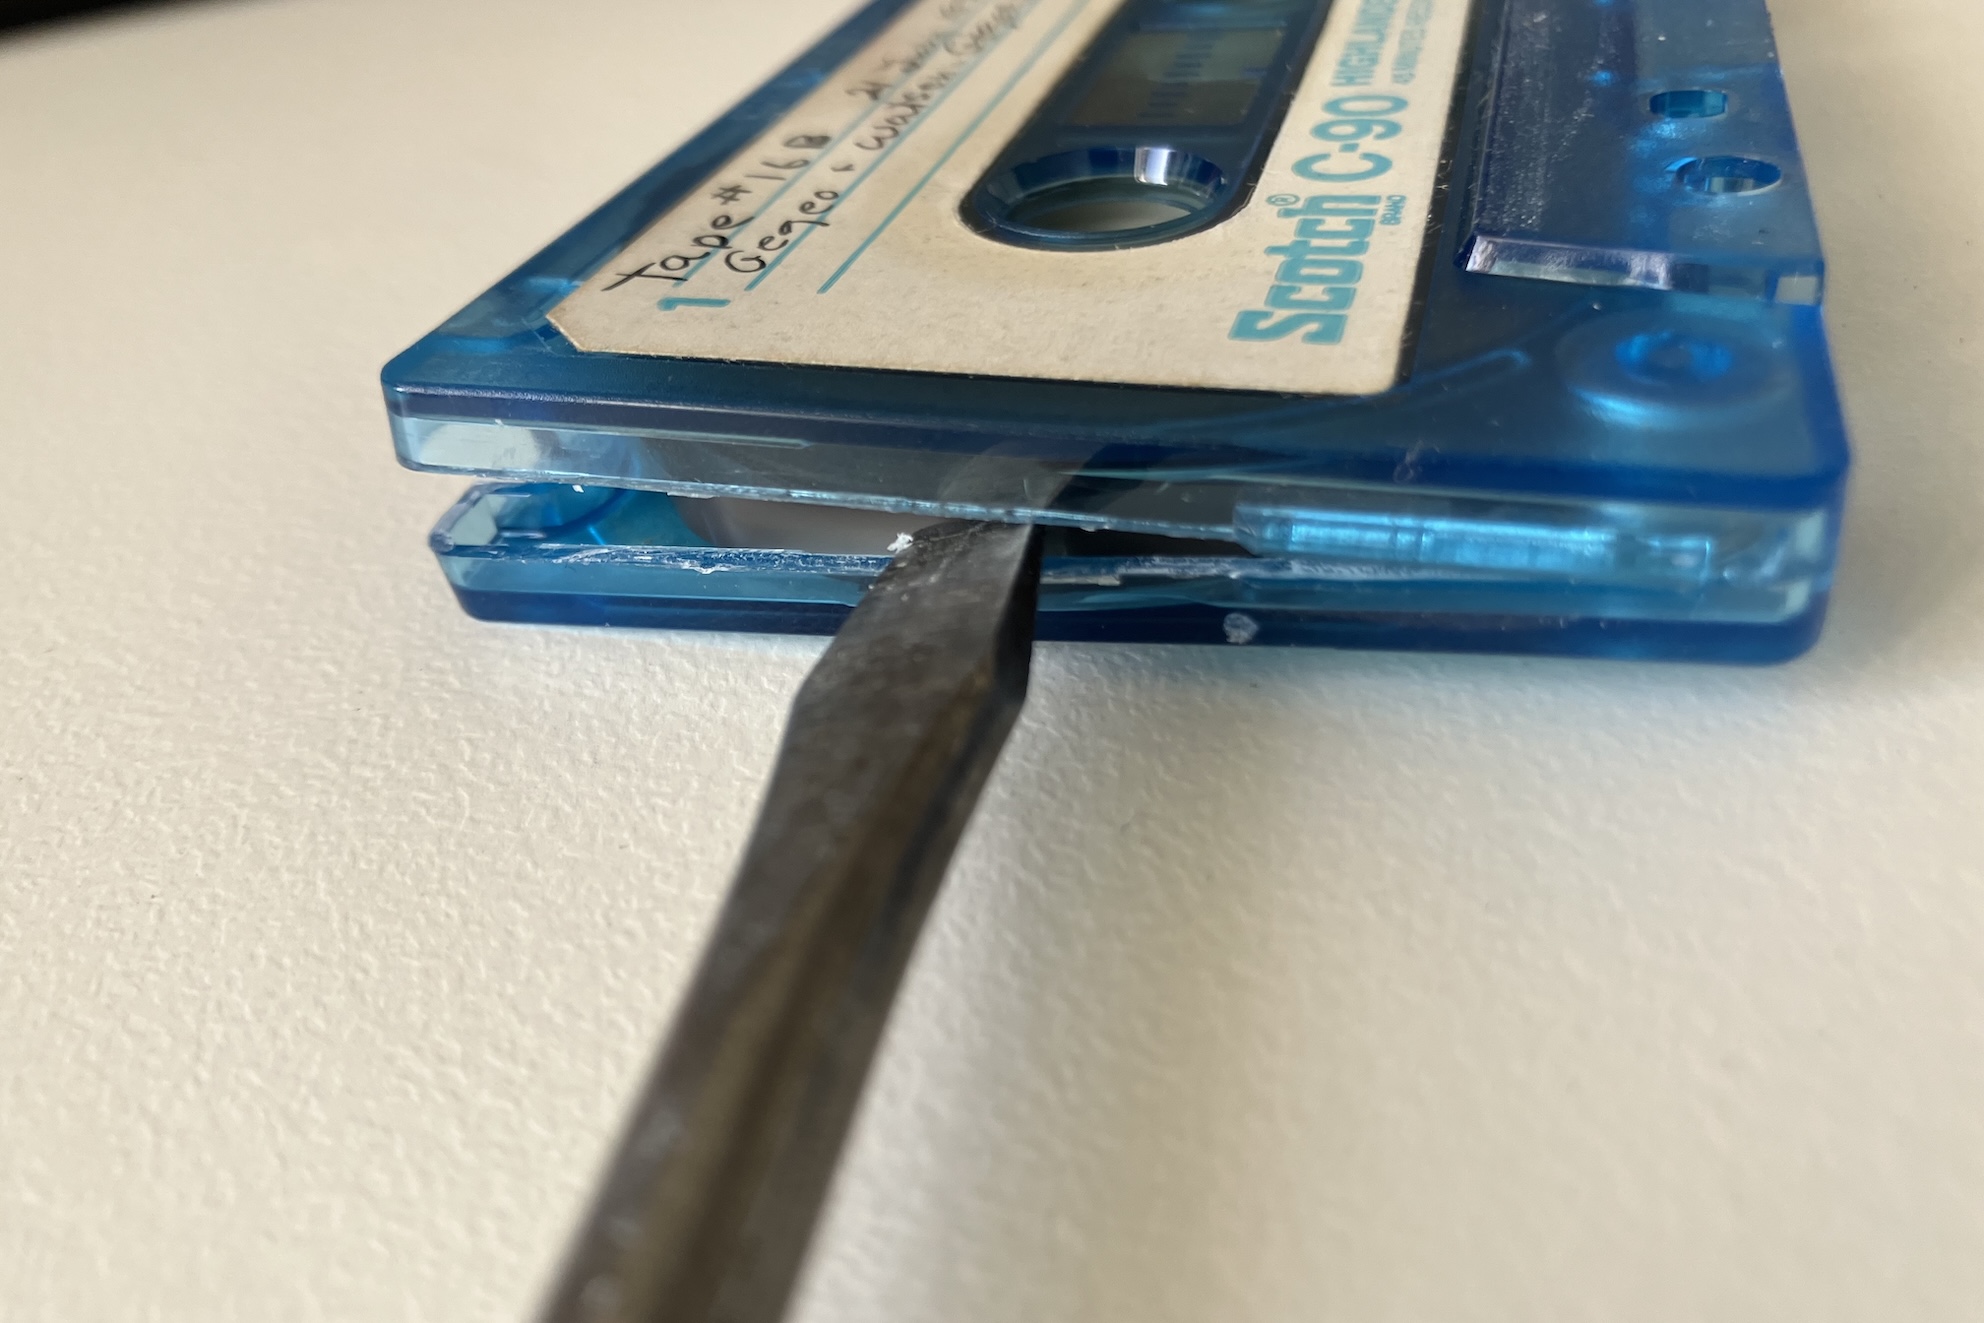
First, the cassette housing needs to be opened up. Cassette housing comes in two types; screwed together (easier to open and reusable) and welded together. These tapes were welded together, making them a bit more difficult to work on. After the housing is broken open it will be unusable, though we still want to be gentle with it so as to not damage the tape inside, and so that the housings are in a good enough condition to be returned to the depositor. I find the easiest way to open them up is to firstly break off the write-protect tabs (the little tabs on the top edge of the cassette), then stick a flathead screwdriver in the hole created and gently twist it. This should start to split the two sides open along the seam. I then manoeuvre the tool around the seam until the whole thing splits apart (sometimes there is also a plug connecting the two sides – it might need a final bit of levering to pop it apart).
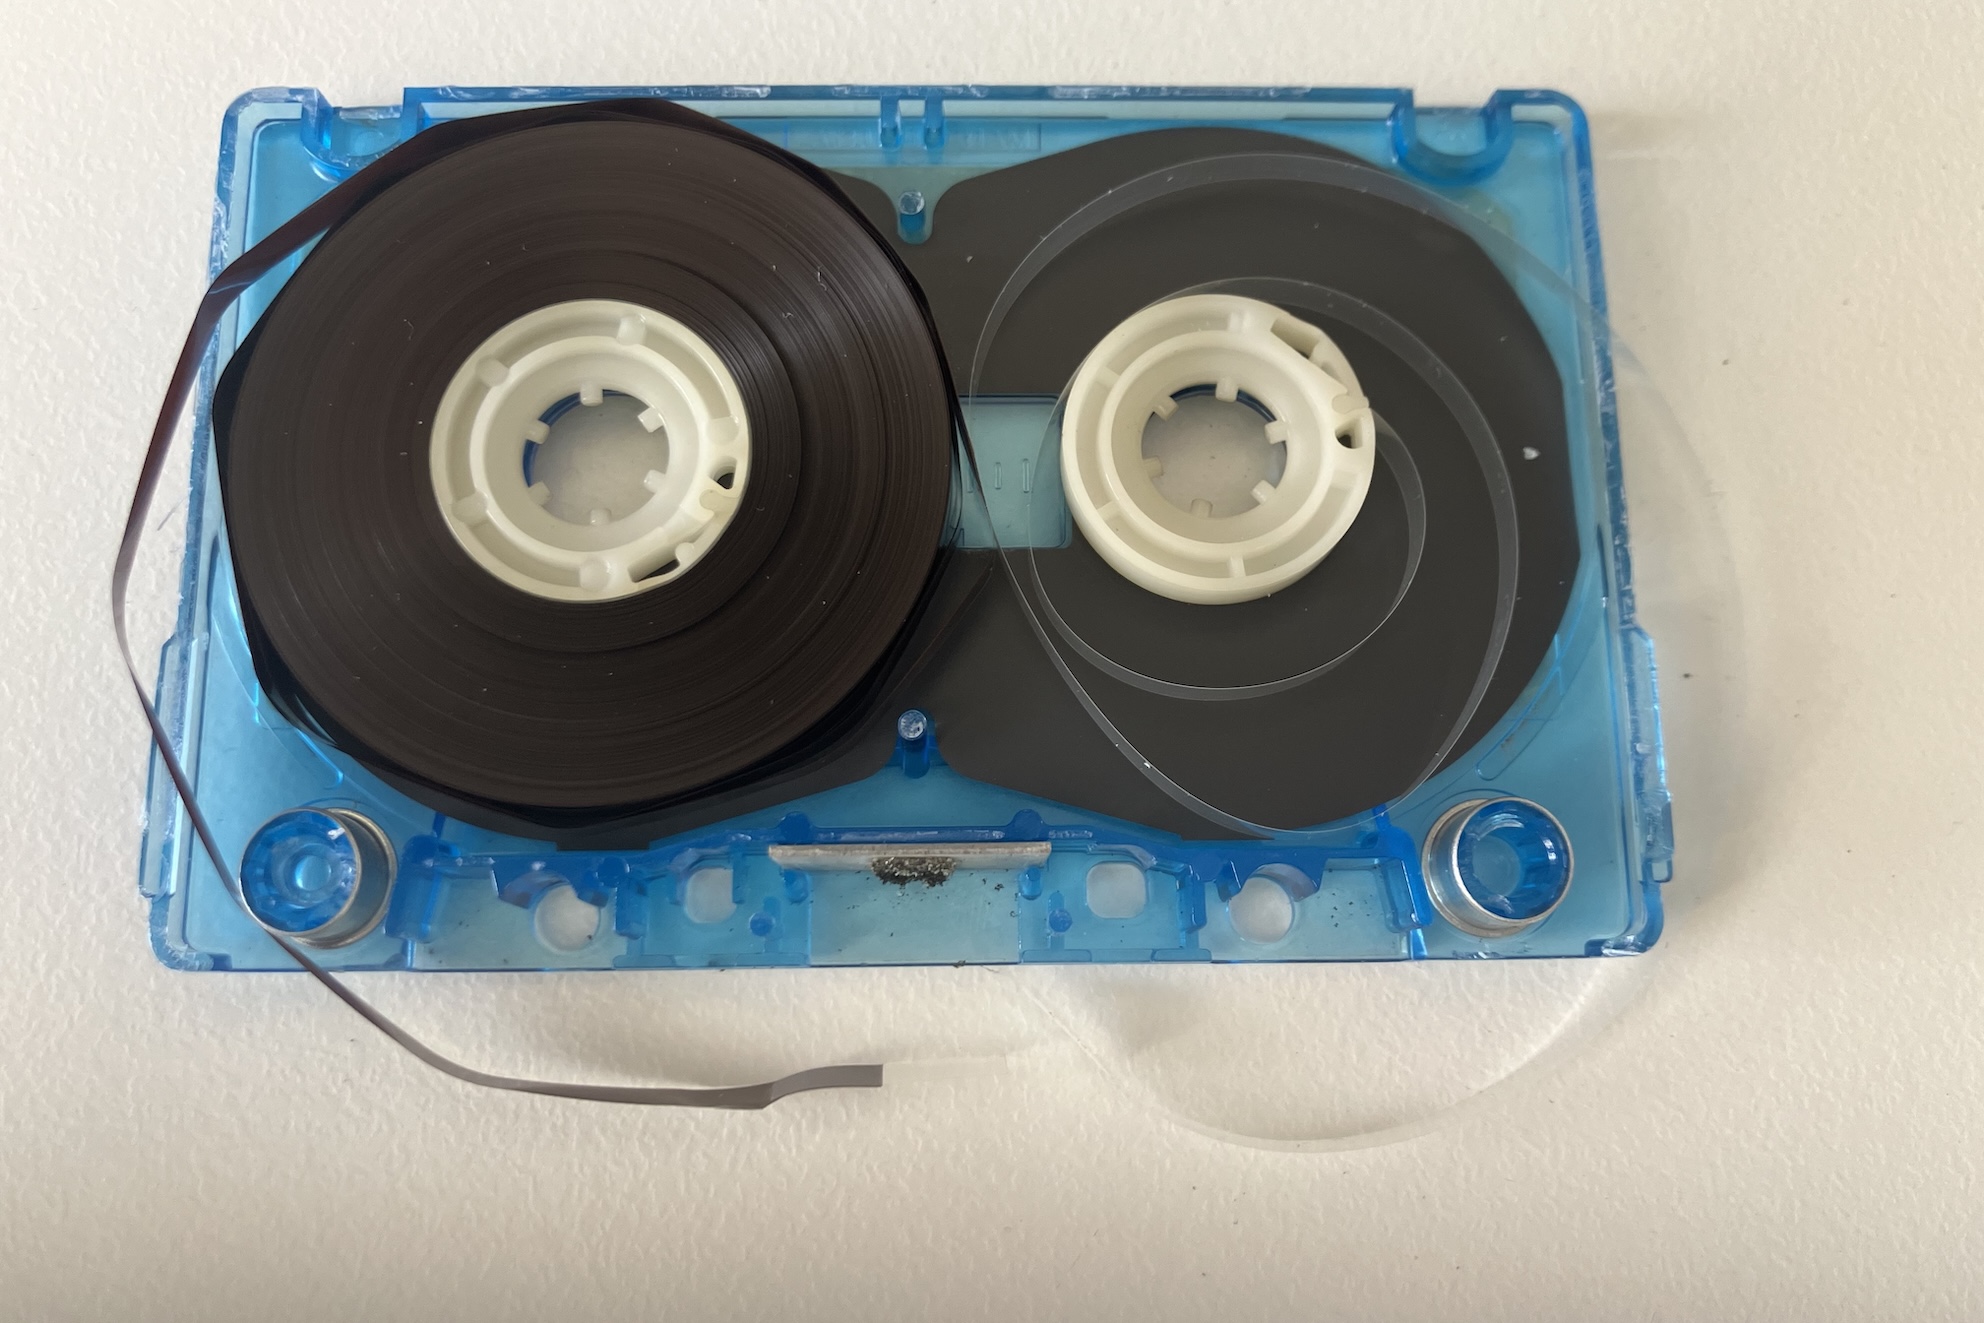
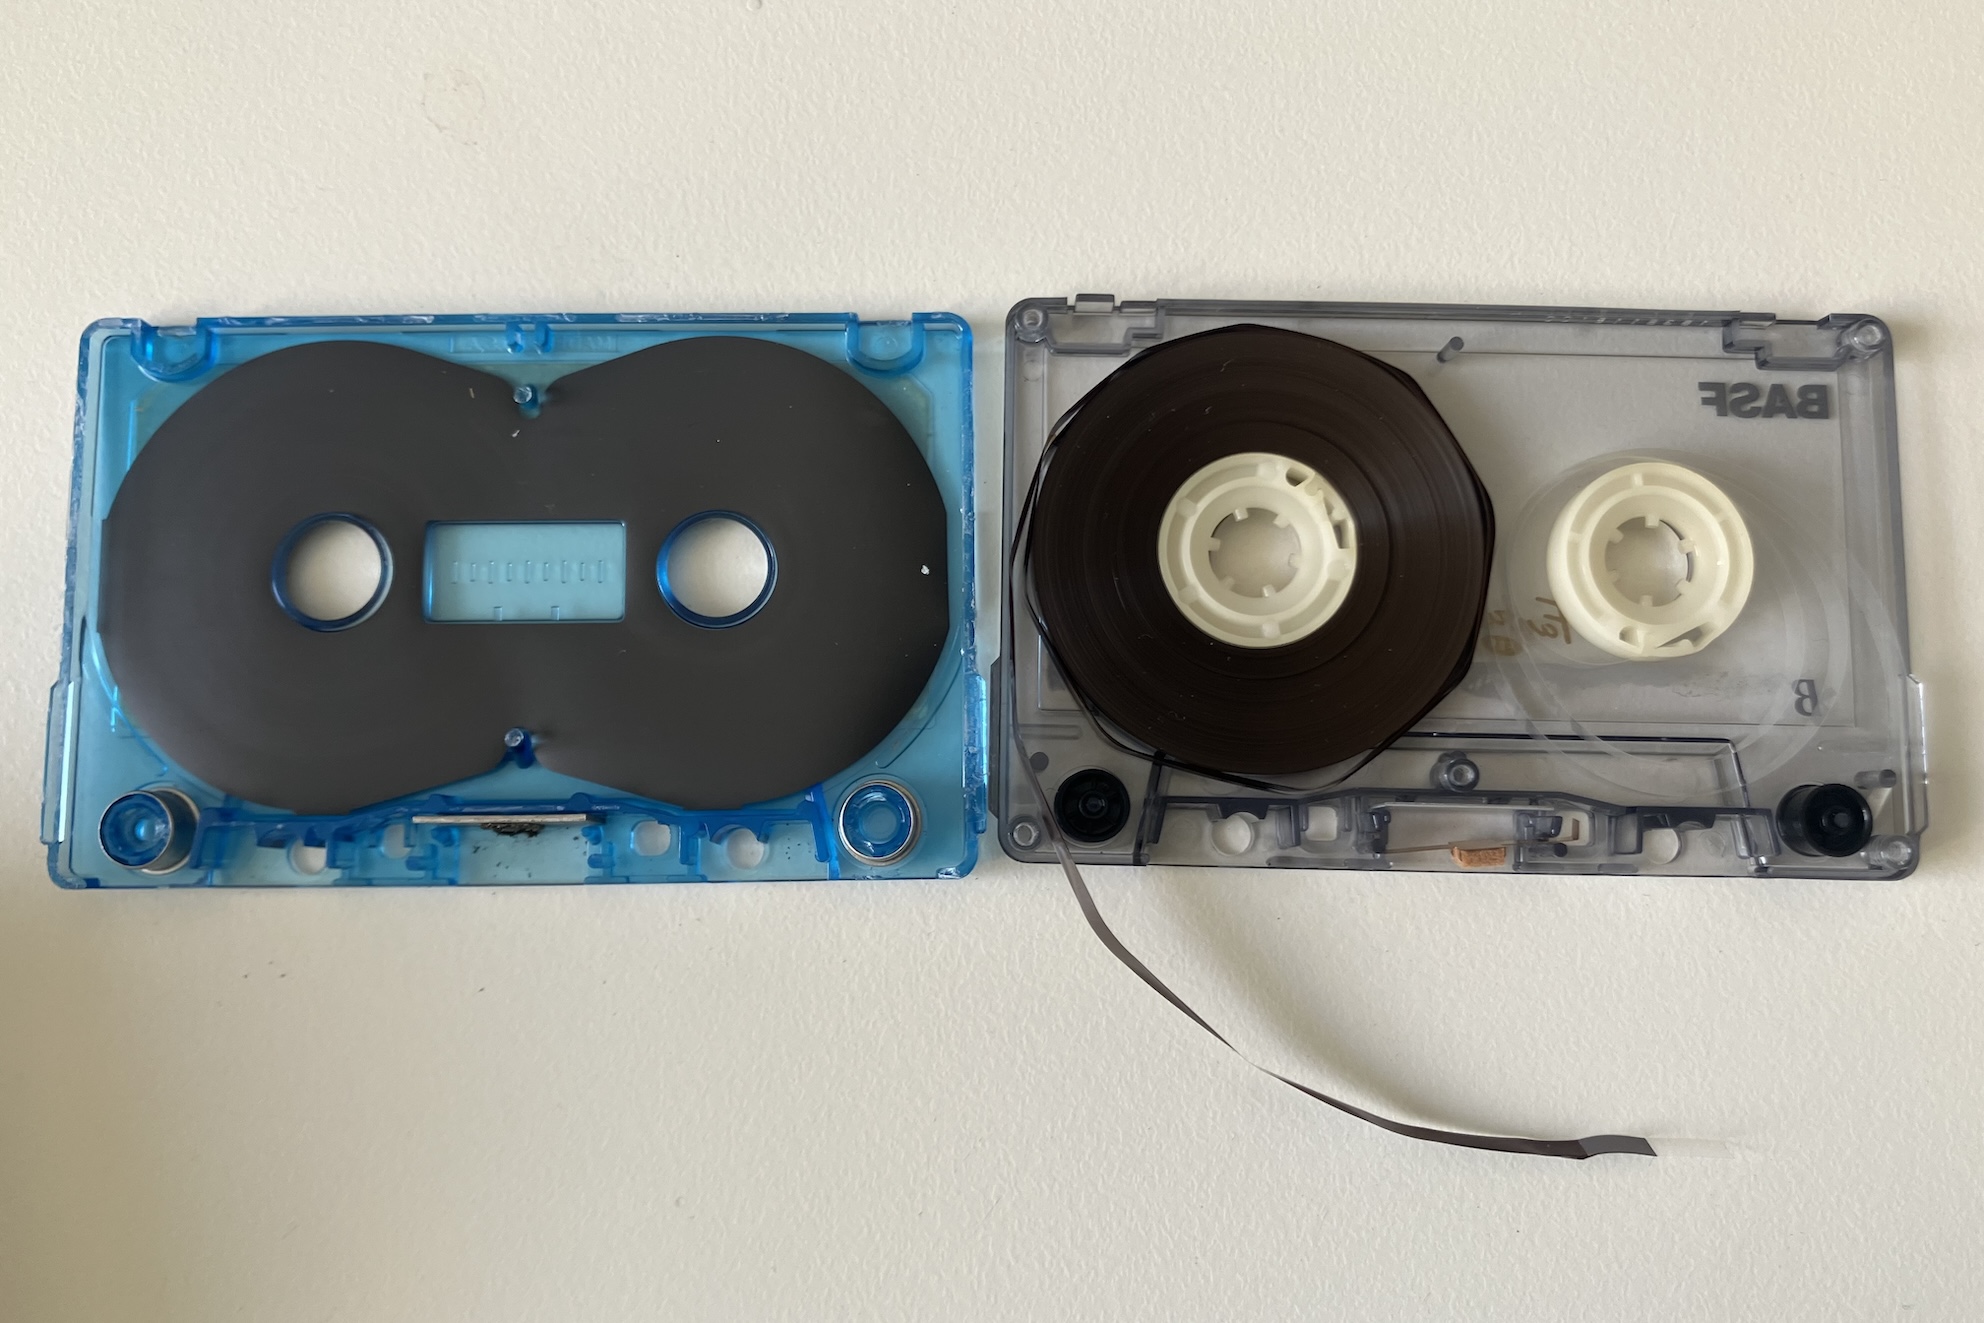
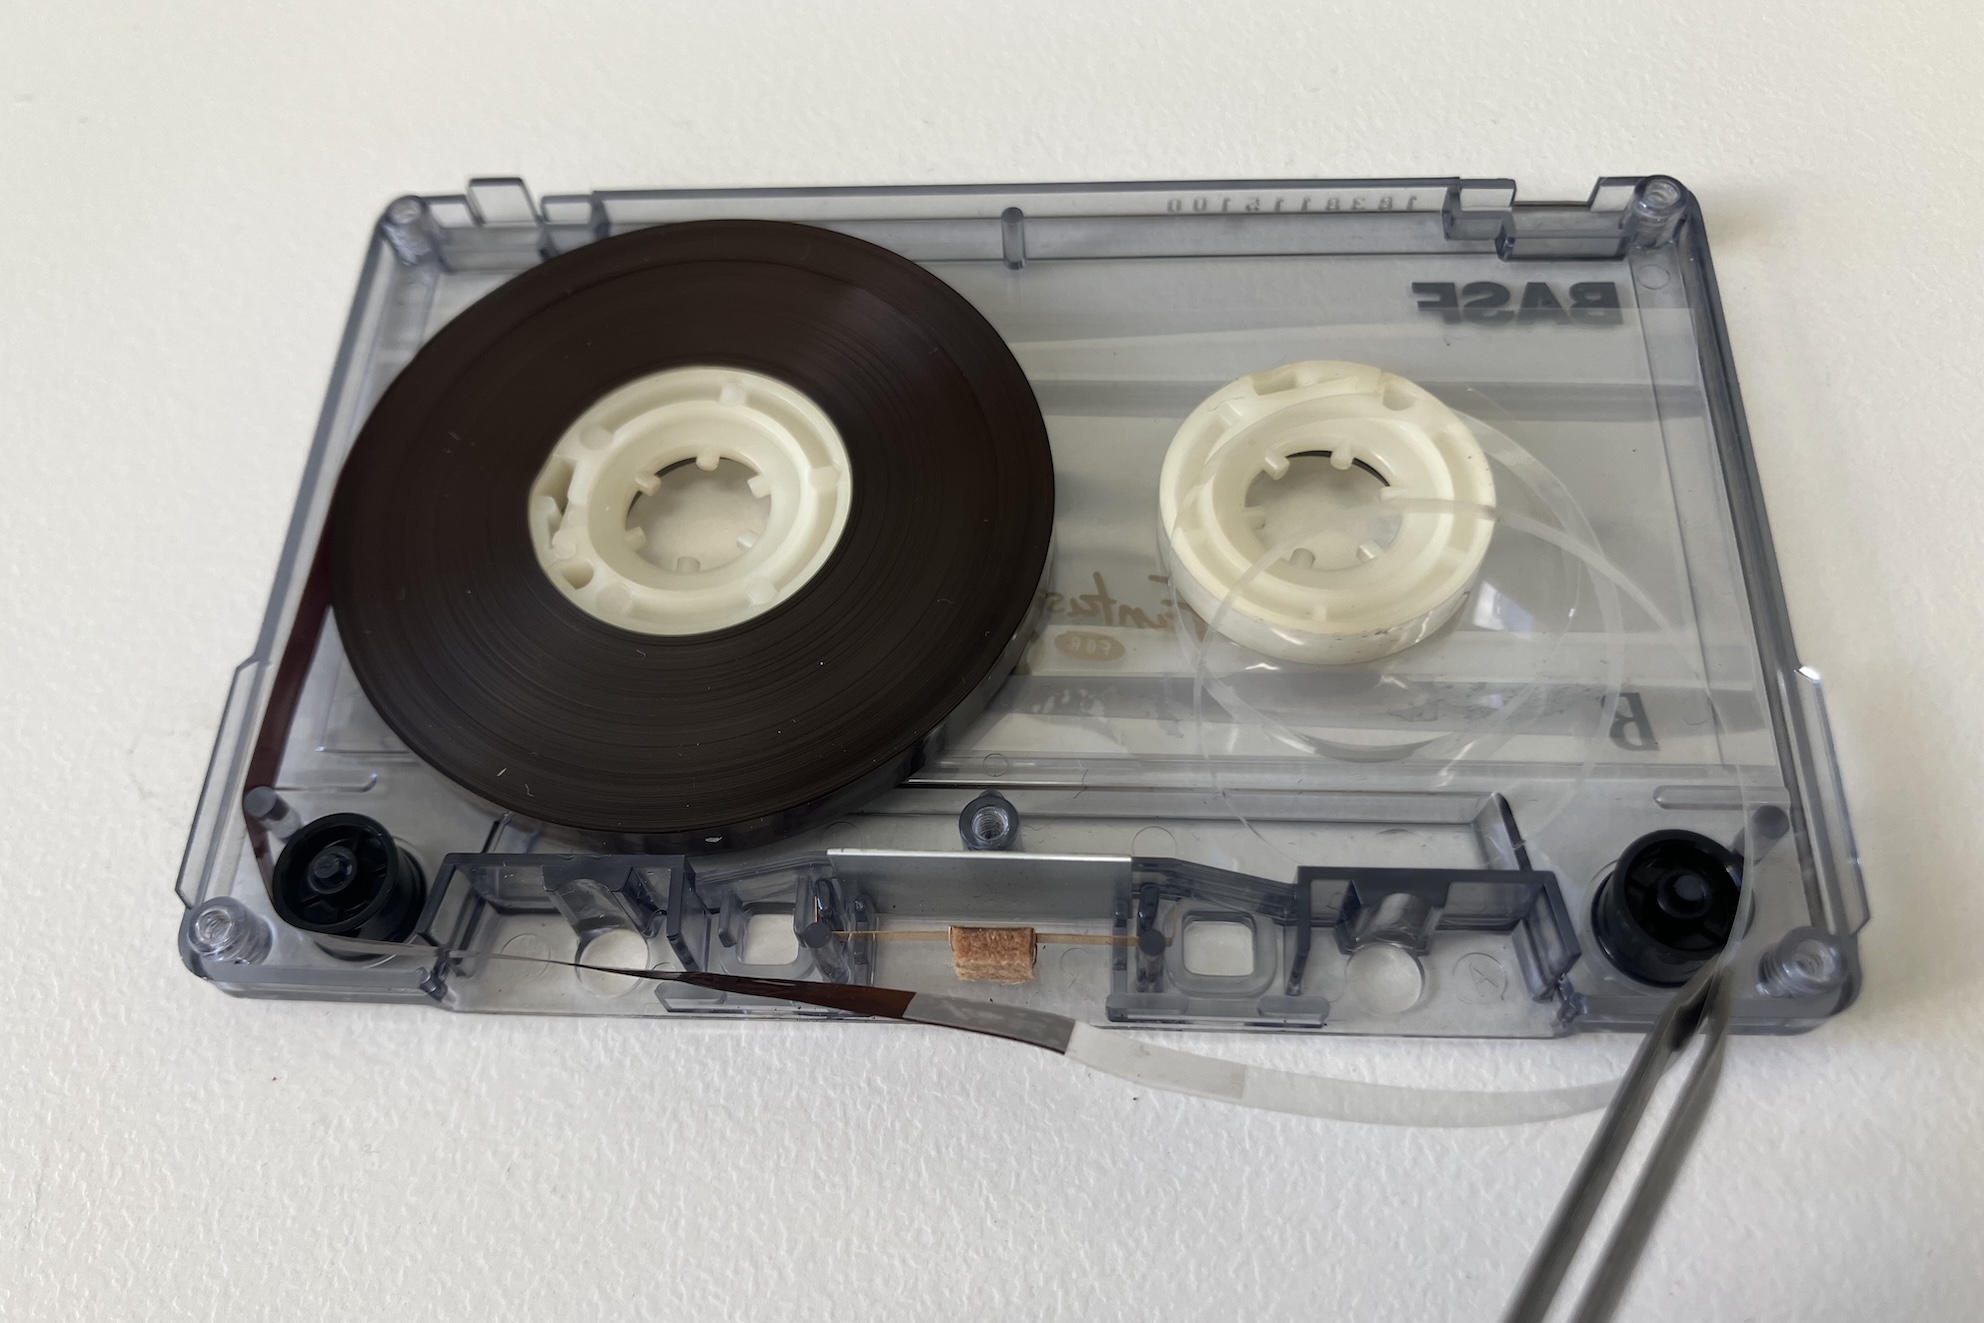
Once inside I can assess the condition of the tape. Sometimes the tape hasn’t actually snapped, but the little clip on one of the tape reels has broken and the clear, non-magnetic tape (the “leader”) at the end of the pack has come loose. In this case the clip can simply be replaced and the leader can be clipped back into the reel.
Often, a break occurs where the leader meets the magnetic tape. In cassette production, the leader and the magnetic tape are joined with a small piece of splicing tape. Over time this tape can degrade, causing it to detach when the tape is pulled through the machine.
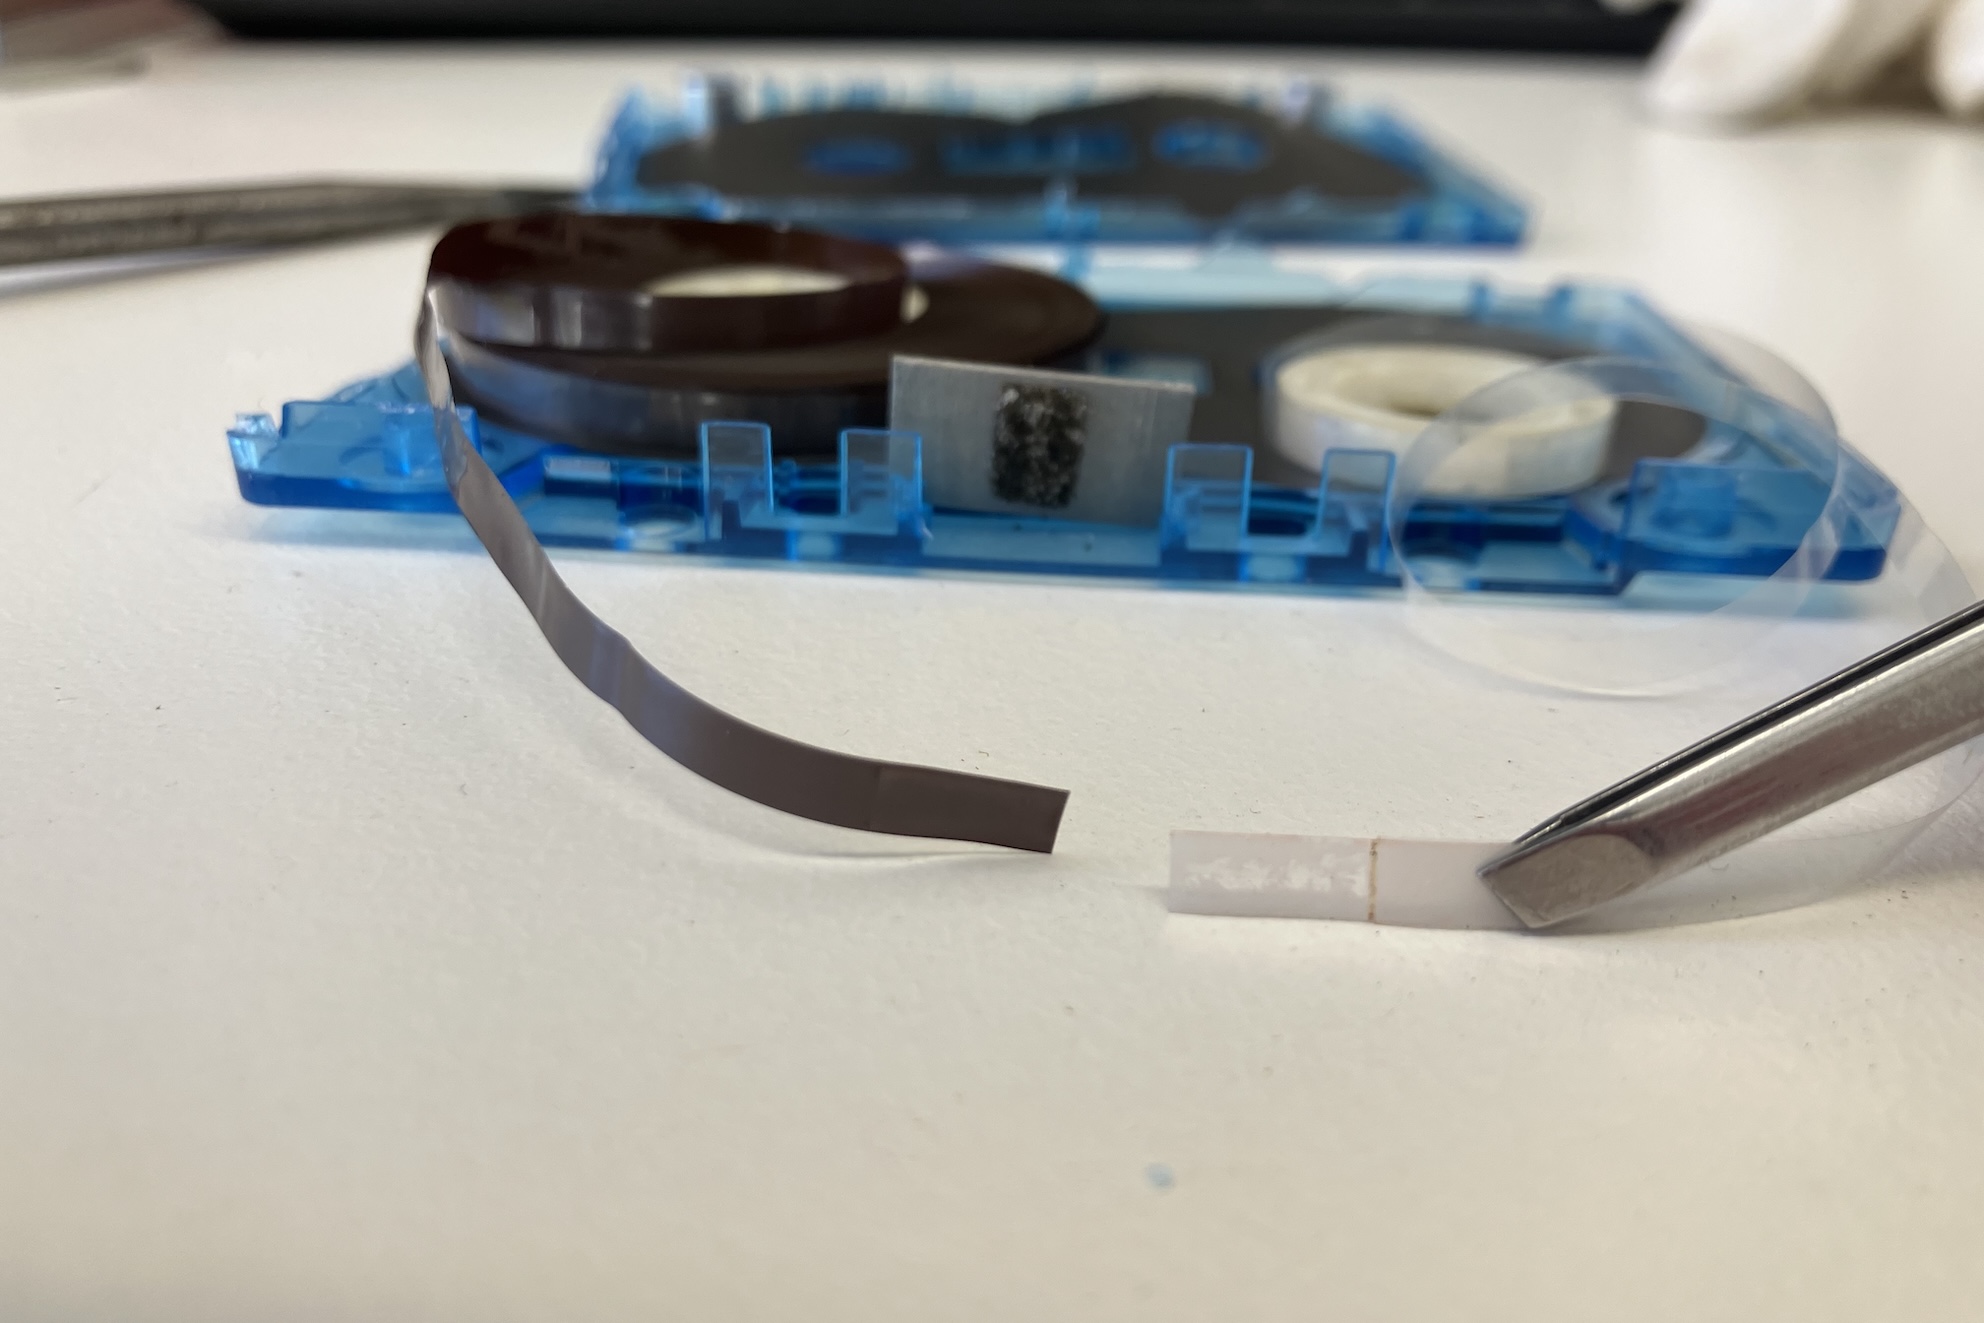
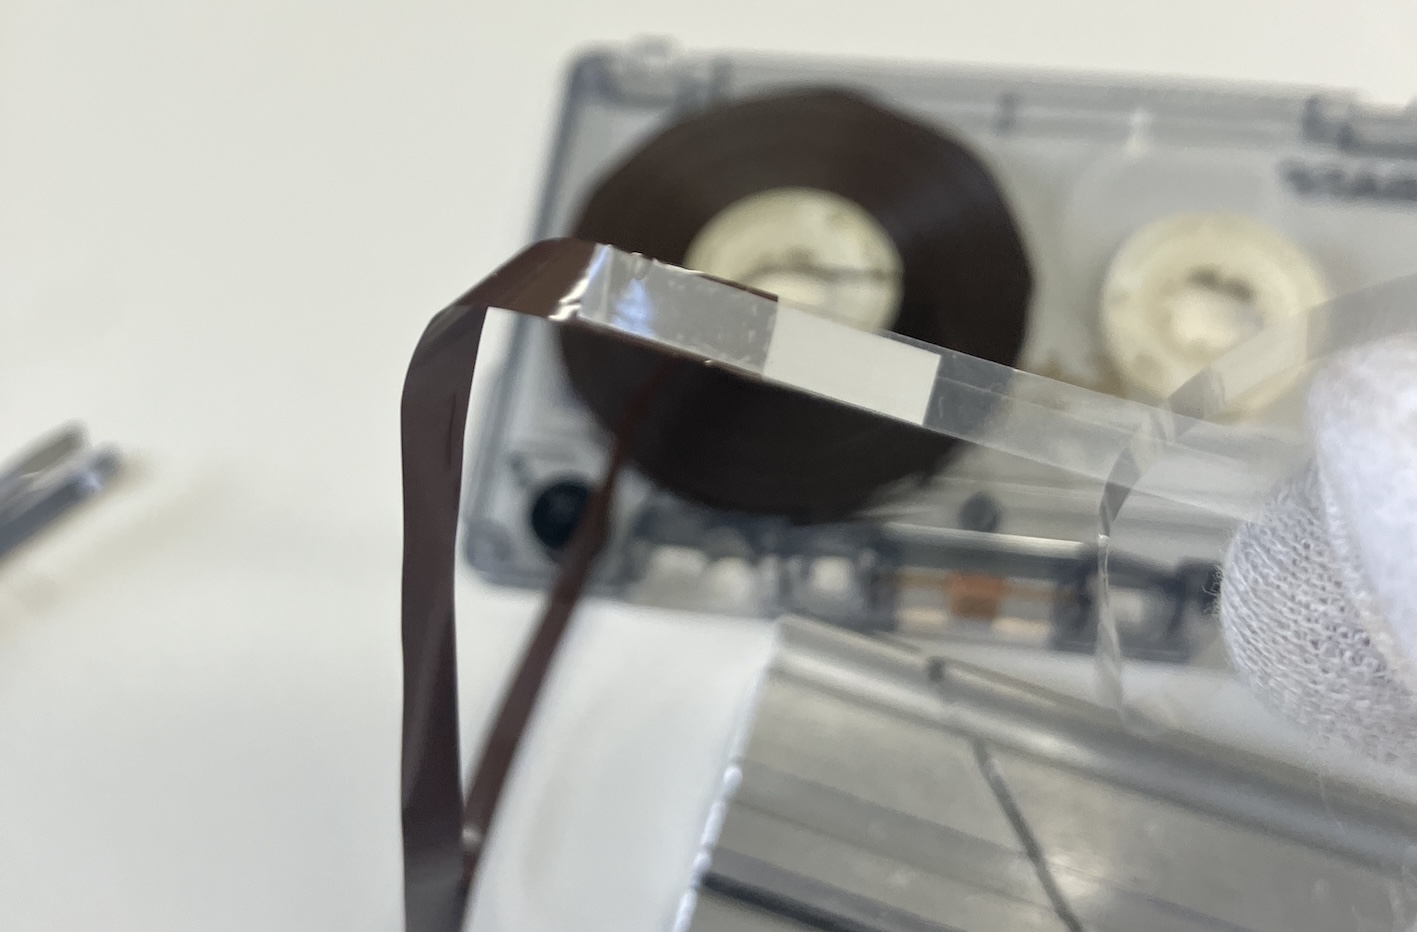
This is what has happened to each tape in the current tape collection: the tape has detached from the magnetic tape but then gummed up and attached to the next layer of tape. Therefore each piece of splicing tape needs to be carefully detached and then the leader and magnetic tape needs to be respliced at both ends of the tape pack. This is a fiddly process where magnetic tape, leader and splicing tape need to be exactly aligned to create a neat splice that will hold together when the cassette is played, but this can be relatively easily achieved with a splicing block (I have also attempted splicing without this tool, which has ended in much frustration).

Before starting to splice, I transfer the tape into its new housing. This housing has screws which hold the two halves together, so it can be reopened as many times as necessary. When I transfer the tape to the new housing, I’m careful not to touch it directly with my hands as the oils can transfer to the tape and damage it. I’m also careful to keep the tape pack flat so it doesn’t start to unravel. It’s a bit of a nightmare to wind back up if it does.
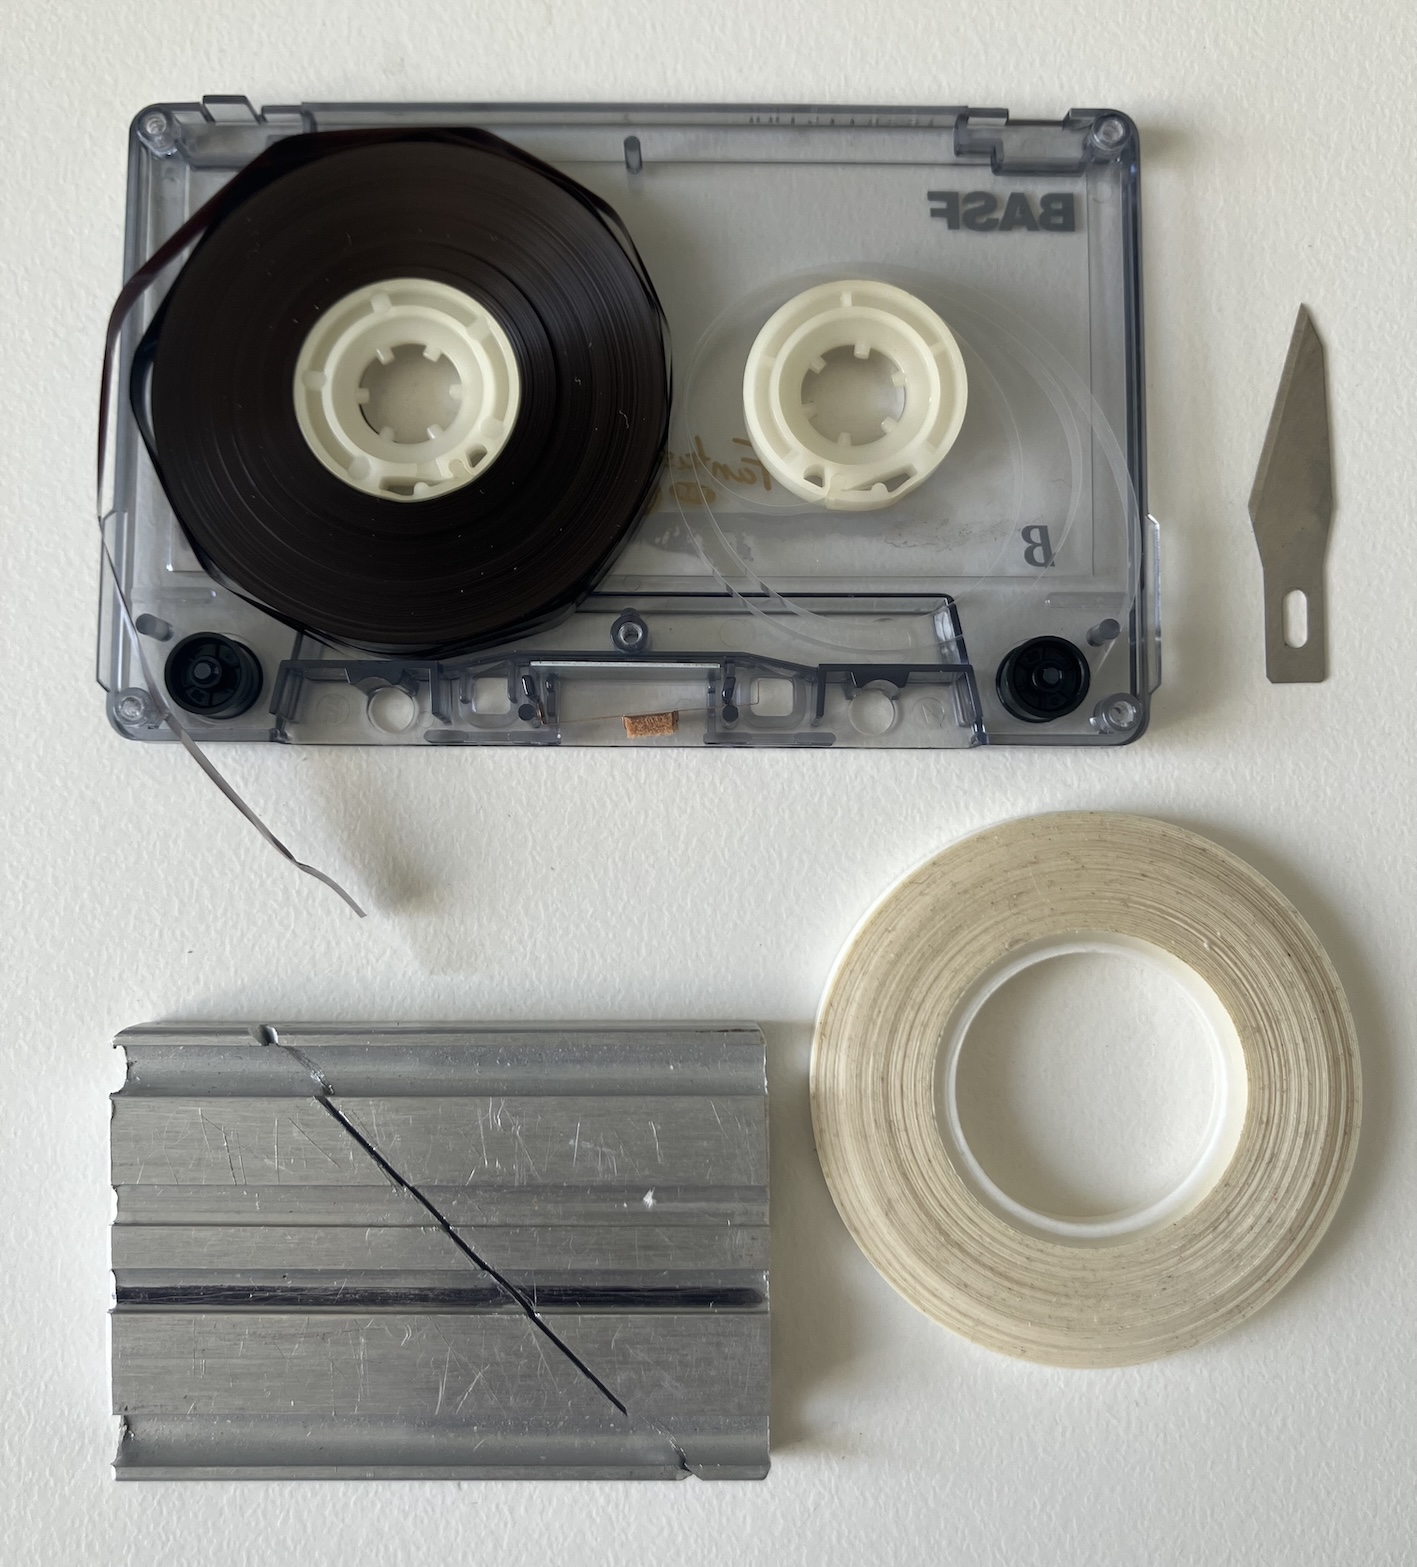
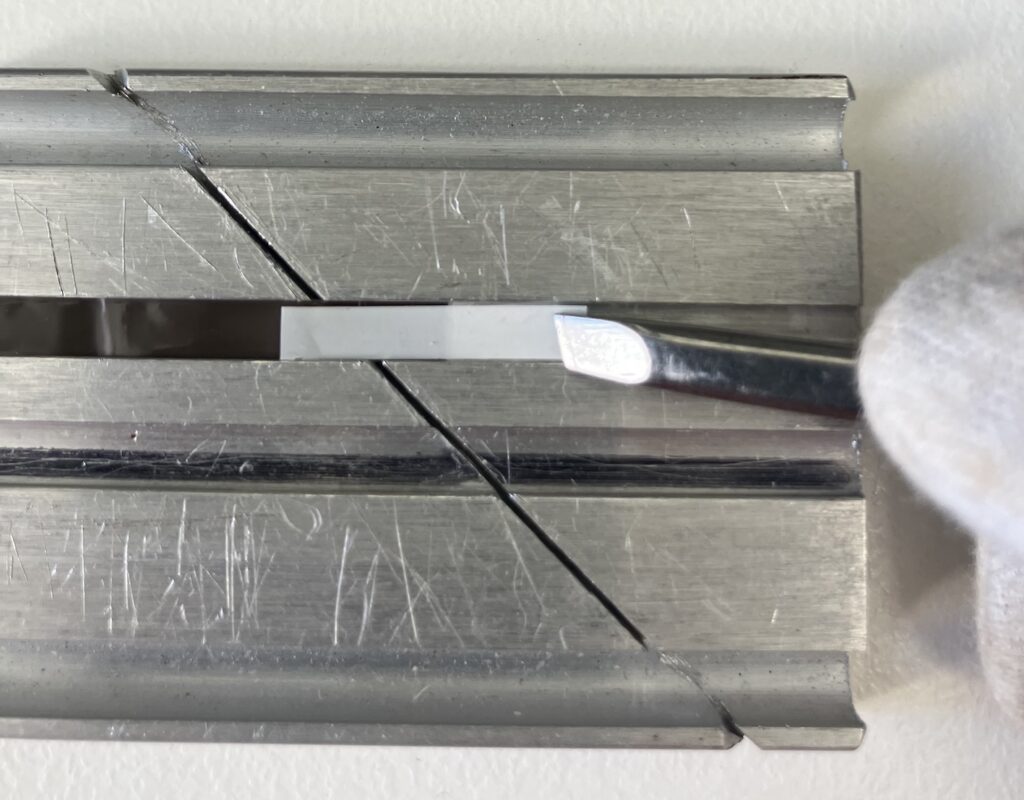
For the actual splicing, I use a splicing block, razor blade and some splicing tape. I remove the degraded splicing tape if it’s still stuck anywhere, then feed the two ends of the tape into one of the channels in the splicing block until the ends line up (when the tape snaps where the magnetic tape meets the leader, the two ends already have perfect 90 degree angles, so we don’t need to do any trimming to get a perfect join). It’s important here to make sure the tape isn’t twisted. This mistake won’t be discovered until later you’ve stuck it together and it’s a pain to undo everything!
Clockwise from top left: Open cassette housing, razor blade, splicing tape, splicing block.
Next I cut a short piece of splicing tape and lay it in the channel evenly across the two ends of tape, applying some pressure. The tape then needs to be eased out of the channel and squeezed at the join with a gloved hand to make sure the splicing tape is firmly stuck down.
The splicing part is now complete. Once this tape is rehoused it will hopefully run smoothly through the machine.
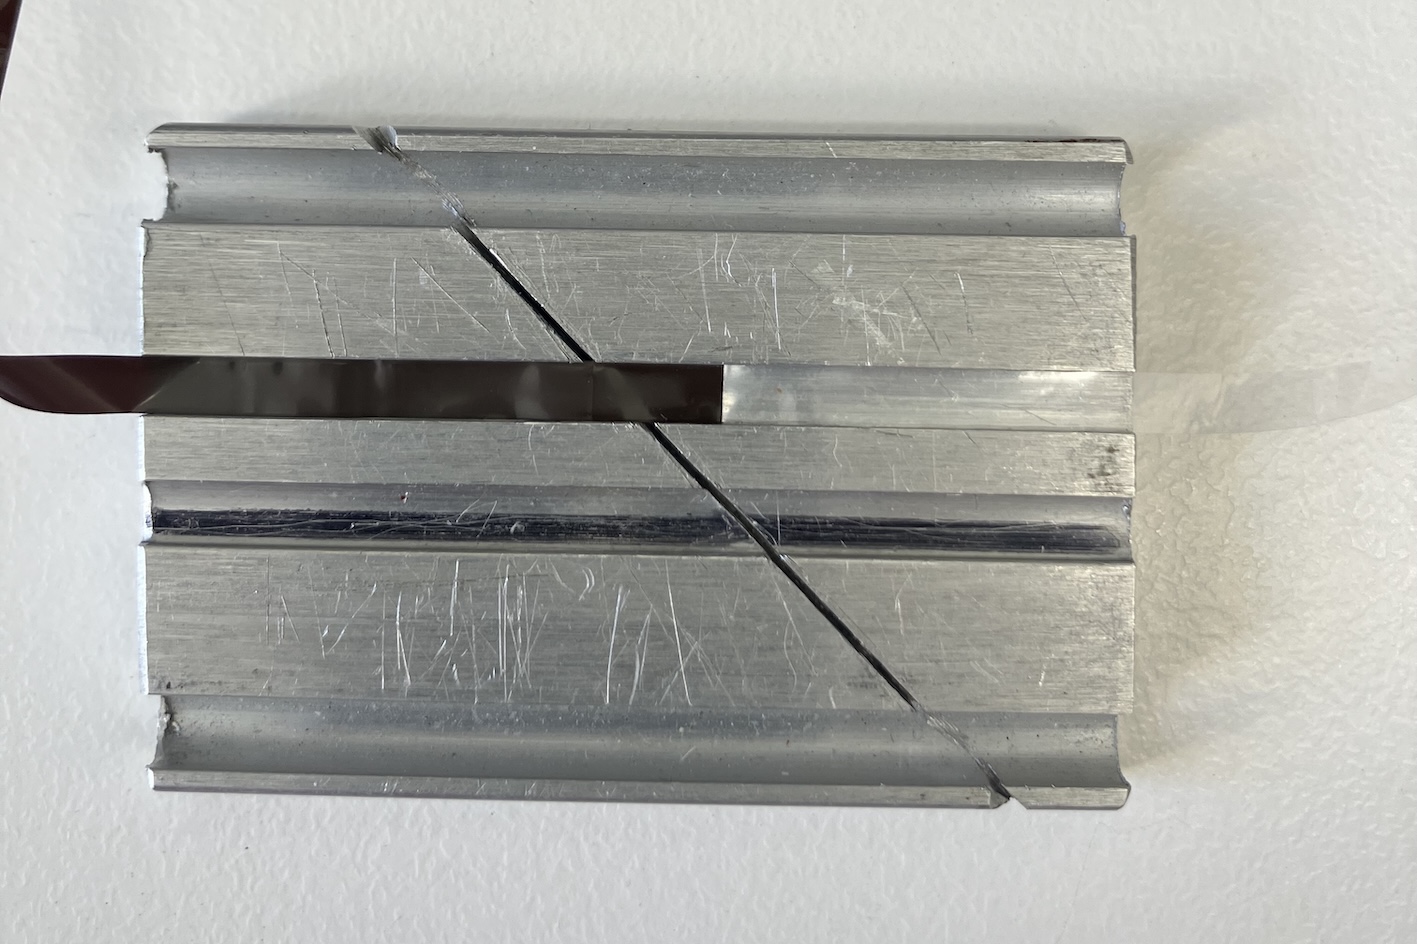
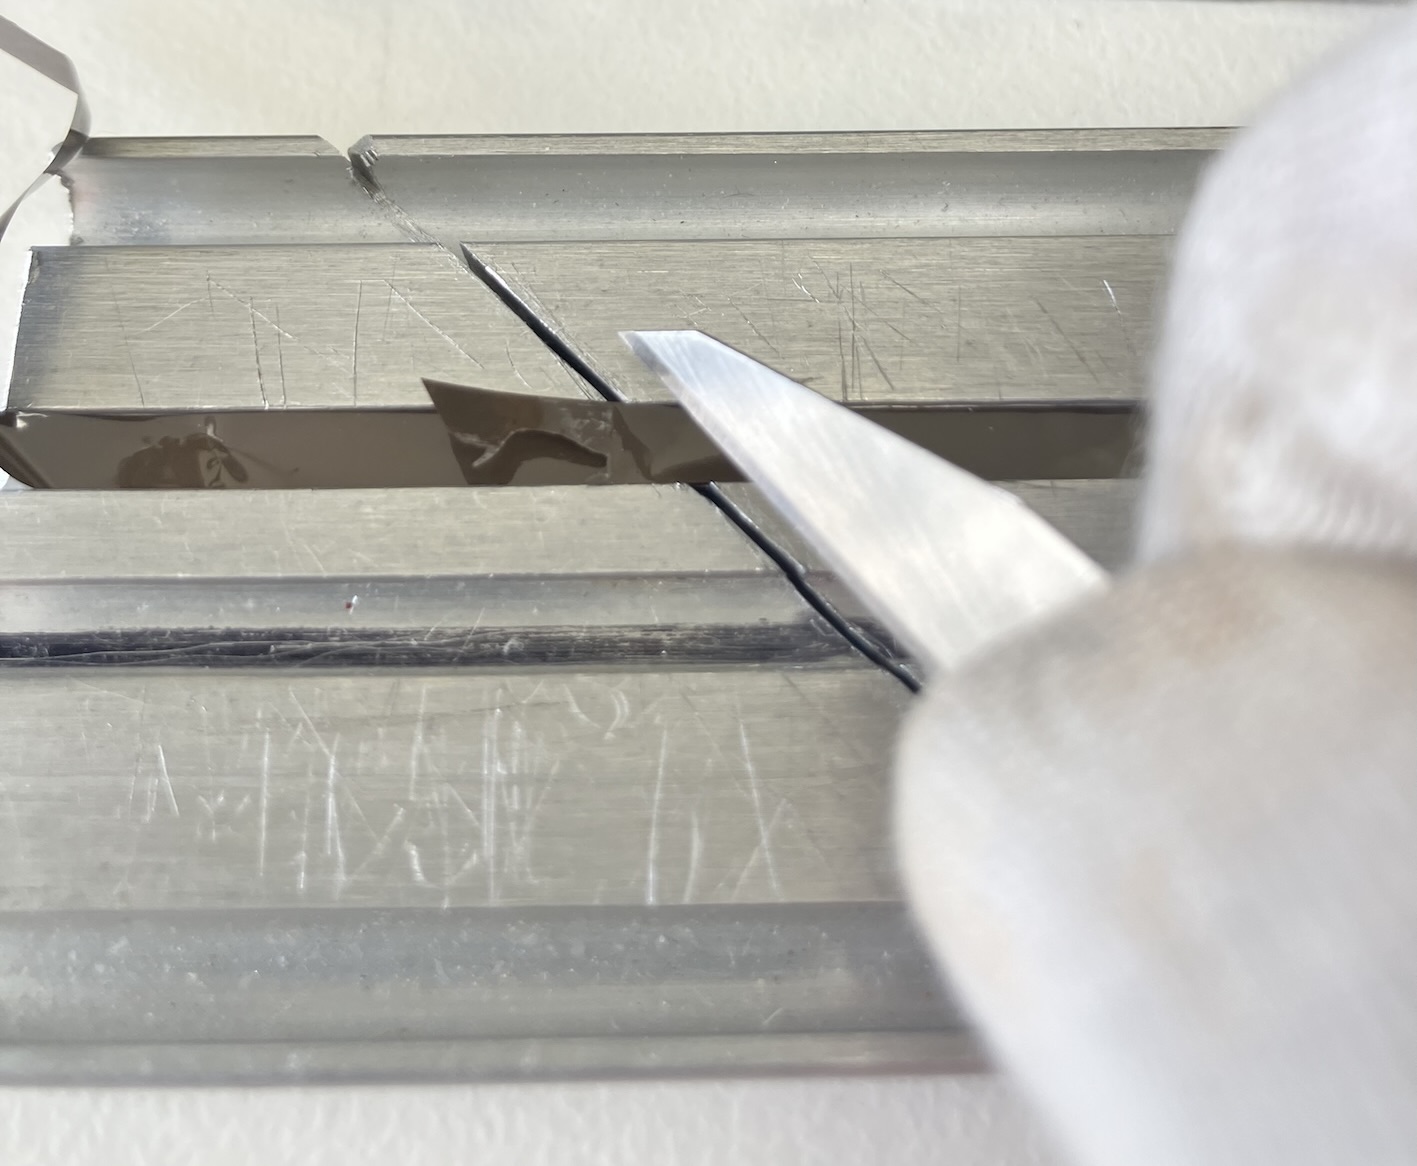
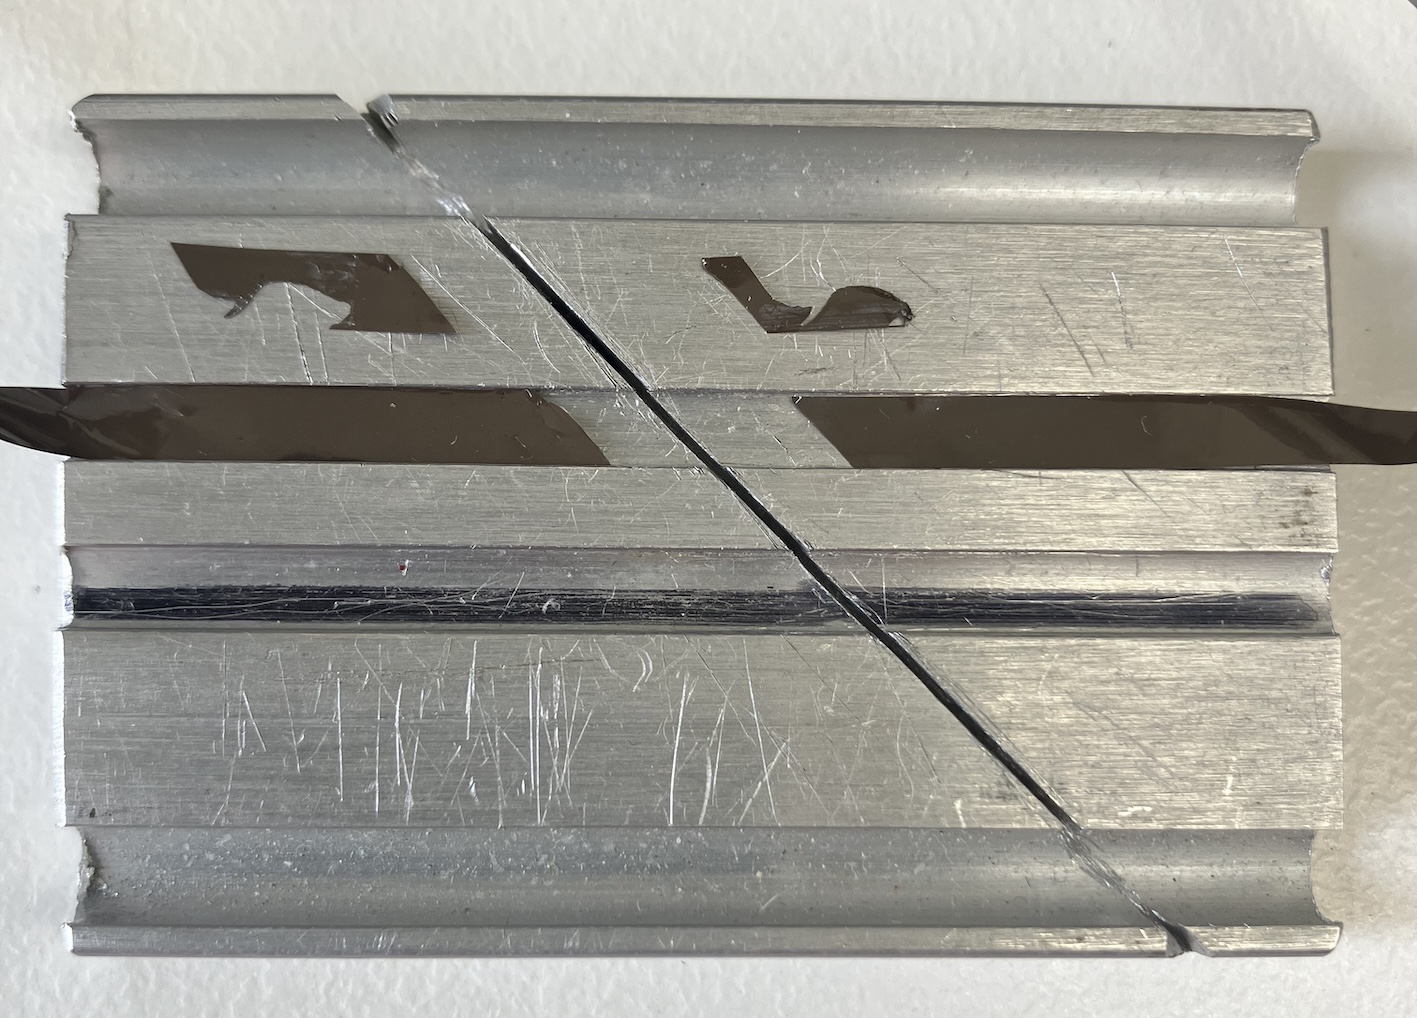
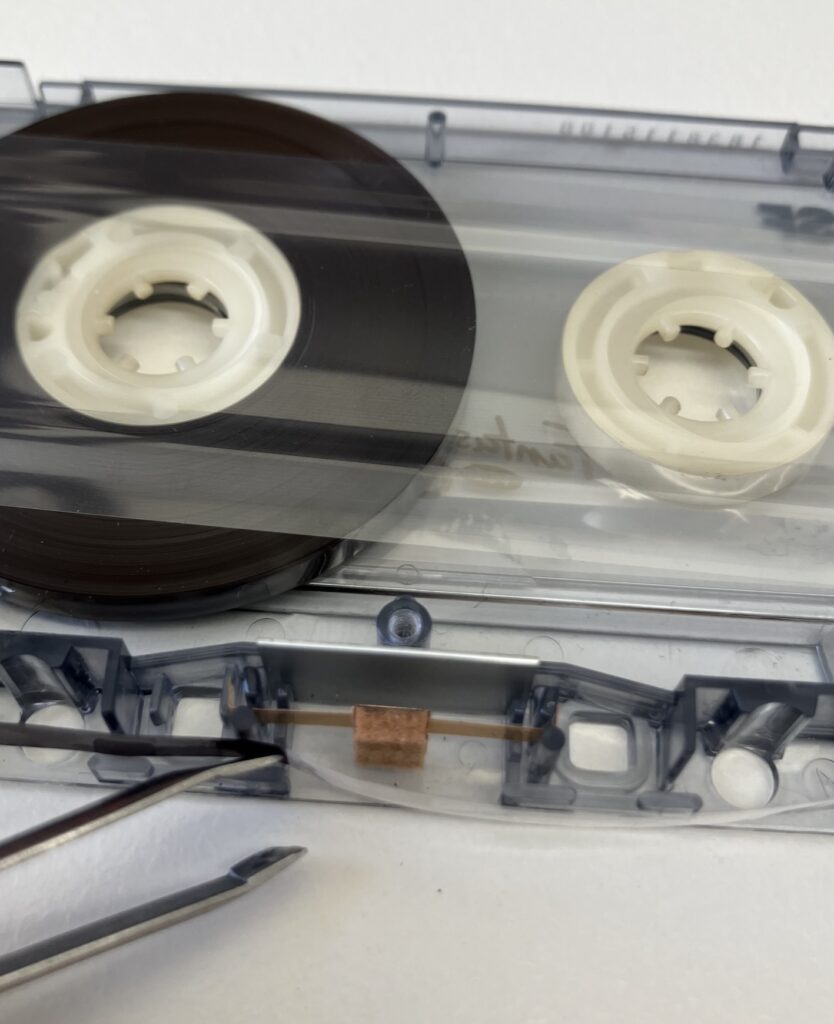
All the tapes in this collection needed this type of splicing, but one tape had also snapped somewhere in the middle of the pack (see photo). Here, we needed to trim the two ends of tape before splicing, whilst saving as much of the tape as possible.

(Although it was tempting here to not cut the tape at all, and instead fit the two ends back together like a jigsaw puzzle, there would have been more risk of overlap or a loose edge which then has the potential to get caught up in the tape machine and damage the tape further). I laid the two ends of tape in the channel, overlapping the two ratty ends and sliced through both layers in one cut, maintaining the same angle on both pieces of tape by using the 45 degree angle in the slicing block. I then used the splicing tape in the same way as before to reattach the two ends.
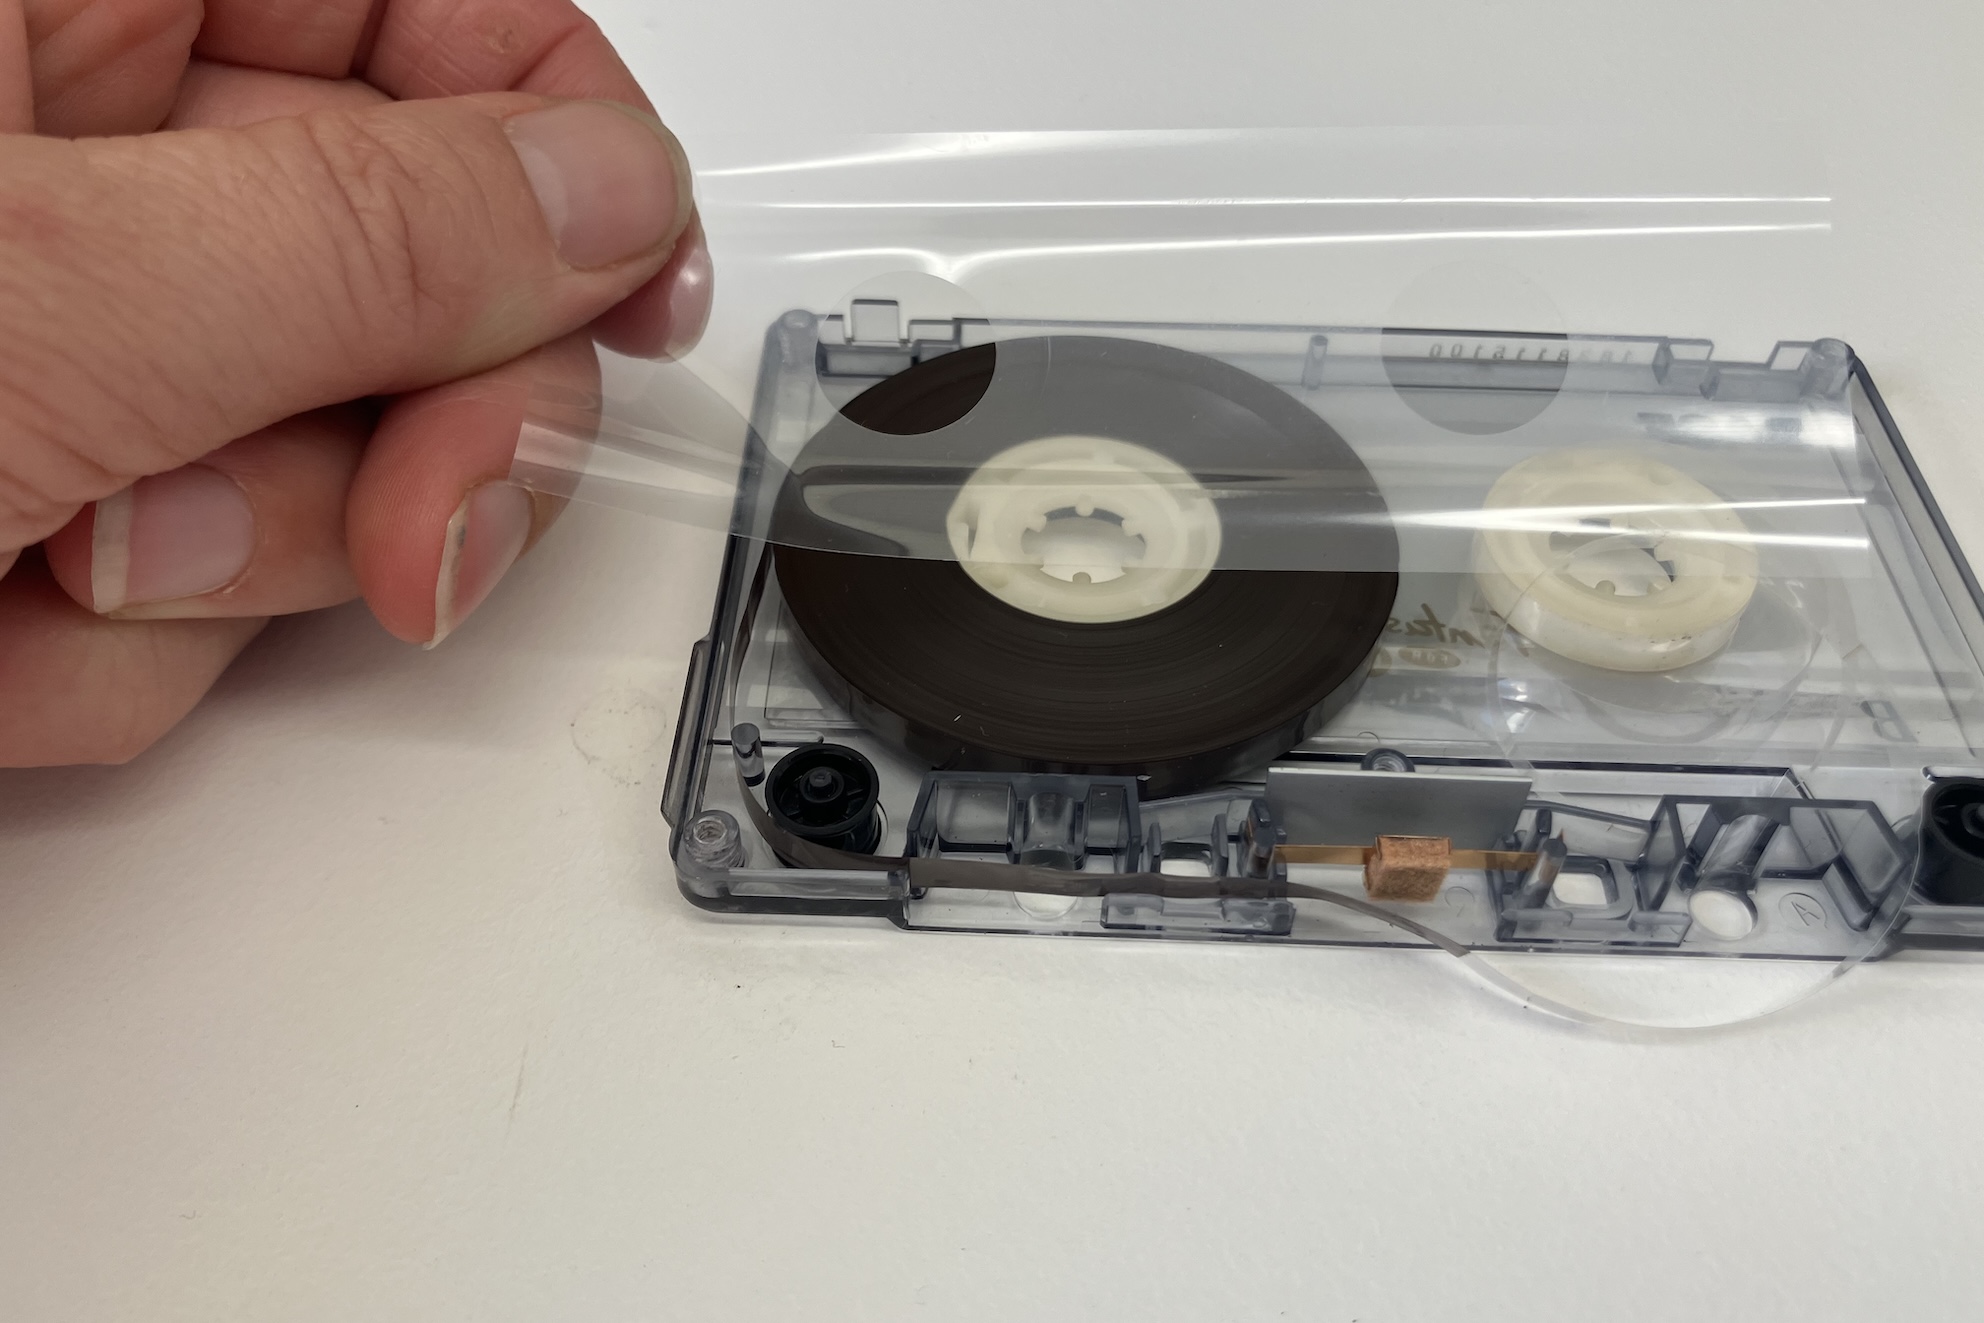
After completing the splicing, it’s just a matter of getting the tape to sit neatly in the housing and closing it up. At this stage the tape really likes to try to unravel. It can be helpful here to cover the tape pack with the slip sheet (the soft plastic sheet that goes between the tape pack and the housing to reduce friction) to hold the tape in place while getting it all back into position.
Once this is achieved, it’s time to replace the front of the housing, screw it together, and label it. Splicing and rehousing complete! Now I just need to fast forward the tape to the other end and repeat the process!
Happily, after this process was completed for the whole collection, we were able to retrieve pretty good quality audio from most of the tapes. There are a handful of tapes that still have audio problems, but hopefully after some treatment from the LM-3032 Tape Restorator, they’ll also be ready for digitisation.

 Follow
Here at Endangered Languages and Cultures, we fully welcome your opinion, questions and comments on any post, and all posts will have an active comments form. However if you have never commented before, your comment may take some time before it is approved. Subsequent comments from you should appear immediately.
We will not edit any comments unless asked to, or unless there have been html coding errors, broken links, or formatting errors. We still reserve the right to censor any comment that the administrators deem to be unnecessarily derogatory or offensive, libellous or unhelpful, and we have an active spam filter that may reject your comment if it contains too many links or otherwise fits the description of spam. If this happens erroneously, email the author of the post and let them know. And note that given the huge amount of spam that all WordPress blogs receive on a daily basis (hundreds) it is not possible to sift through them all and find the ham.
In addition to the above, we ask that you please observe the Gricean maxims:*Be relevant: That is, stay reasonably on topic.
*Be truthful: This goes without saying; don’t give us any nonsense.
*Be concise: Say as much as you need to without being unnecessarily long-winded.
*Be perspicuous: This last one needs no explanation.
We permit comments and trackbacks on our articles. Anyone may comment. Comments are subject to moderation, filtering, spell checking, editing, and removal without cause or justification.
All comments are reviewed by comment spamming software and by the site administrators and may be removed without cause at any time. All information provided is volunteered by you. Any website address provided in the URL will be linked to from your name, if you wish to include such information. We do not collect and save information provided when commenting such as email address and will not use this information except where indicated. This site and its representatives will not be held responsible for errors in any comment submissions.
Again, we repeat: We reserve all rights of refusal and deletion of any and all comments and trackbacks.